Showing posts with label nail art. Show all posts

Blasts From the Nail Art Past

Posted by Erin on 11/16/11. Filed under:
1 Comment


I really wanted to show off the amazing teal glass flecked Glee from Jessie's Girl that I'm wearing today, but the weather just won't permit it. I'm also a bit under the weather today and that seasonal depression is coming on pretty strong lately. On top of all of that, I'm still trying to pursue a really fun "dream" of mine and have not been able to get started quite yet. So I'm anxious, feverish, and descending into depression all at once. It makes writing these blogs a bit difficult, tbh. But I'm trying!

Anyway, because I have no new swatches to show you, I figured I would compile a few of my favorite nail art manicures from the last year or so. Some of these you may not have seen yet.

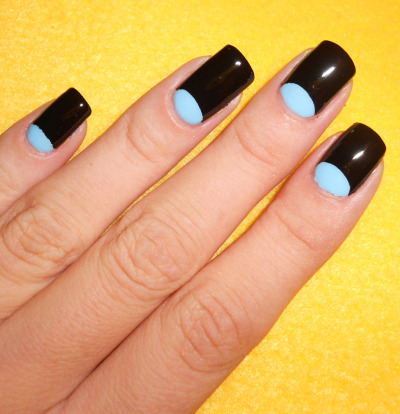
Half moons with What's With The Cattitude as a base color.

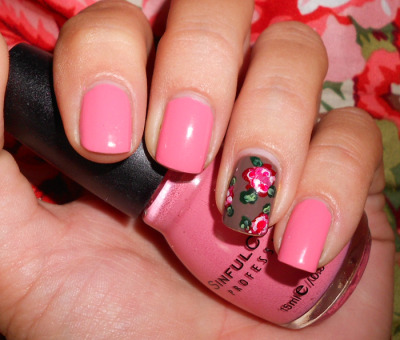
One of my many floral designs. This one matched a dress that I bought that ended up being 3 sizes too big for me :(
Yet another floral design
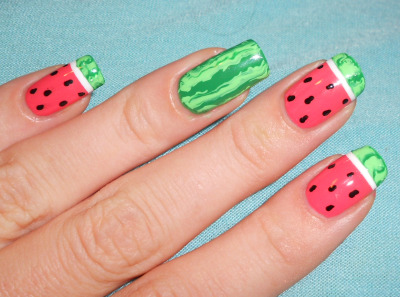
Watermelon nails!
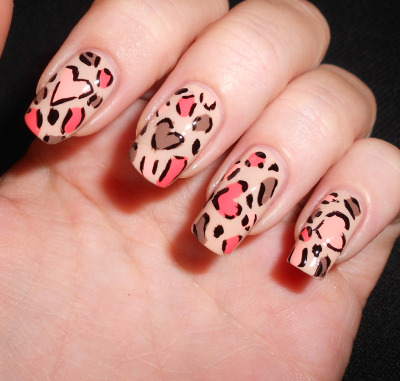
leopard print nails with hearts
You can see all of these on my Tumblr blog, which is where I store all of my nail art photos that I for one reason or another don't post here.

It's strange to see the evolution of my nails. They really have grown a ton!

Ombre Nails

Posted by Erin on 11/11/11. Filed under: , , ,
2 Comments

I've seen a ton of ombre manicures out there, but for some reason or another I never thought to try it out for myself. But today while I was trying to figure out what to do with my nails, I decided to give it a go. I'm glad I did! 

I used Wet N Wild's Through The Grapevine for this. I started out by pouring a bit of it onto a piece of aluminum foil, and added a drop of white to it after every nail I painted.

I liked this so much that I tried my hand at it once more just to see what it'd look like with a different color.


This is Yoga-ta Get This Blue from OPI. I used the same technique as I did with Through The Grapevine. I love this, but it's a bit of a fail for 2 reasons. One being that I used a shimmery base color and the shimmer was diminished with every drop of white creme that I added. In hindsight I should have used a shimmery white. The other issue is the fact that by the time I got to my pinky nails the polish had begun to thicken and it applied kind of shitty because of that. I still love it though. I'll just have to tweek the technique for next time.

Plaid Dress and Nailart To Match

Posted by Erin on 10/18/11. Filed under:
4 Comments

Look what I did to match my dress today:


I'd write more but I'm exhausted from running errands and I have an Opie and Anthony show to listen to ;) Hope you're all enjoying the unusually warm and sunny weather around America.

Rainbow Tie Dyed Nails (RIP Steve Jobs)

Posted by Erin on 10/6/11. Filed under: , ,
3 Comments

I'm sure that by now we've all heard the news that Steve Jobs has died. It isn't exactly a surprise, but it still sucks. I use Apple computers exclusively and became a big fan of Apple's technology over the last 5+ years. Jobs will be missed.

This mani started out as an idea that is far different than what it became. Initially I was attempting to create a small rainbow apple just like the vintage Apple logo. Well, I'm simply not that skilled with a paint brush and I had to abort the mission. I always think of how good my sister would be at doing nail art. She's very artistically gifted, and is really meticulous and able to get the tiniest little details to look perfect on whatever she makes. Sadly, I do not have the same gift as she does. But she has short stubby fingers and bites her nails to the point where her hands look deformed. So I suppose we're even ;)

But as I was saying- this mani started off with Steve Jobs memorial aspirations and ended in this faux tie-dyed situation that you see here now. Not what I originally wanted, but still kind of cool.


It's also not the cleanest mani I've ever done, but these marbley type designs are a real bitch to clean up. You should see my right hand....

Rainbow Candy Nails (for lack of a better title)

Posted by Erin on 10/2/11. Filed under: , ,
7 Comments

Please excuse my lack of posting for the last 5 days or so. It's getting colder and I'm trying to hibernate through the wave of depression that wants to swallow me whole. (That sounds really emo, doesn't it?) I am one of those people who gets incredibly lethargic and down when summer ends, and in my head it's got nothing to do with the weather, but it must considering how often history repeats itself.

I only mention this because it's affected my desire and enthusiasm for blogging. "I'll post it tomorrow" or "I'll take pictures later" have been my attitude. But I'm determined to push through it and get back to a regular schedule. Which is why I got myself an iced coffee the second I woke up this morning and started on this blog. Feeling sorry for myself only wastes time.

Here are some (bad) photos of a design I did a few days ago. I've been wanting to do a sweet rainbowy design for a long time, but couldn't put together anything that looked presentable until now. I love this and plan to do many more renditions of it in the future. But I have to make a note to buy some more polish thinner, because the silver striping polish I used was waaaaaaay too goopy.


I told you that the photos were bad. I have some swatches lined up for later today or tomorrow, depending on what the sky looks like, and I promise that the photos of those will be decent.

Tutorial: Poppies Nail Art

Posted by Erin on 9/12/11. Filed under: , ,
3 Comments

I took some time last night and finished the tutorial I told you guys about yesterday. Because it was dark out and my apartment is so old that there is virtually no overhead lighting in it, I had to make due with the flash on my camera. 

This is a really simple design that even nail art beginners should be able to master. If you decide to try it out, please show me your work. I'd love to see what colors you've used :)

Poppies Nail Art Tutorial


Step one:
Compile all of your materials. You'll need:
- A base color. I like to use a muted color so that the brightness of the poppies really pop (no pun intended). For this mani I used Virtuous by Me Me Me. 

- 2 bright colors in similar shades. For example, if you chose to go with blue poppies, you might want to use a royal blue and then maybe a teal blue. I decided to use 2 shades of red. One is a deep burgundy shade and the other is a true bright red. 

- An orangey yellow or mustard colored polish. You could probably get away with using a true yellow, but I think an orange toned yellow looks best.

- A black striping polish OR black polish and a striping brush. Doesn't matter. Essentially they're both the same. 

- A small-medium sized dotting tool.

Step two:
 Paint your nails with your base color. And please, pardon my messy paint job.

Step three:
Add a small dollop of polish to your nail. Try to visually plan out where your poppies are going to be and add your dollops accordingly. Using your dotting tool, gently manipulate the polish to create an imperfect flower shape. These do not have to look identical to one another. In fact, the less perfect you make them, the better the outcome. And don't forget to alternate your poppy colors!

You should get something that looks like this:

Step four:
Once you have all of basic poppy shapes on your nail, start adding centers to them using your yellow polish. Honestly, I just use a light touch with the polish brush for my centers. But if you aren't feeling confident enough to to that then you can always use your dotting tool. Just make sure that the yellow centers aren't perfectly round. They should be slightly ovaled and off center, and again- imperfect.

Step five:
 Using your black striping brush, add (imperfect) black centers to the yellow and random stems.

Tips and tricks:

- Be imperfect. I know I am being redundant about this but it's worth stressing. I've done a lot of floral designs, and the reason they look good and are fun to do is because you have a lot of room to screw up. They actually don't look good if they're perfect.

- Mess around with colors. Sometimes colors that you wouldn't expect to look good together end up working well in this type of design.

- Do one nail at a time.

- Have fun. Tweak the design to your hearts content. There is no wrong way when it comes to nail art.

Purple Poppies

Posted by Erin on 9/9/11. Filed under: , , , , ,
4 Comments

My first love is nail art, and I haven't been posting enough of it lately. With the steady stream of new polishes being added to my collection, I put nail art on the back burner. But yesterday I did a design that I LOVE and I plan to do more renditions of it in the very near future. Here is my poppies design:


The base color I used for this is a really pretty lavender from Jordana called Lavender Fields. The 2 colors I used for the poppies are Funky Dunkey by OPI and Through the Grapevine from Wet n Wild. 

Tribal Nail Art

Posted by Erin on 9/4/11. Filed under: , , , , ,
7 Comments

My internet connection is FUBAR at the moment, so I haven't even attempted to make a post. But I did want to do a quick update to show you guys a tribal design that I did yesterday. Hopefully there's enough juice in my connection to upload this. If not, I'm basically writing this to myself...


The green is Jordana's Rich Green and the blue is Mesmerize from Essie.

"Jinx" Nail Polish Strips Review

Posted by Erin on 8/28/11. Filed under: , , , , ,
7 Comments

Nail polish strips appear to be all the rage these days. Obviously Minx started this trend, but there are now tons of knock offs out there that people can do at home for a fraction of the price that Minx costs at the salon. Sally Hansen is probably the most popular option, as it's extremely accessible and relatively inexpensive. Personally, I was never very intrigued by the Sally Hansen strips because for $9 I can buy an OPI polish and keep it for years instead.

BUT...while perusing the nail polish section of Five Below yesterday, I came across these strips called "Jinx", which is obviously their attempt at a cute play on Minx. But whatever. They had some cute patterns and only cost $3. I snatched 2 packs. One houndstooth pattern and another with white stars on a baby pink base. I left the store expecting the worst.

Inside each pack (which I did not photograph because I wasn't really expecting to be writing this to begin with) is a small nail file, orange stick, the strip of decals, and a bizarre and seemingly useless strip of silver foil sticker. I still have no idea what the silver foil is for...

I tried the pink and white stars strips first and did a half assed job at applying them. I didn't bother to buff my nails first (which they instruct you to do) and didn't do a great job at evening out all of the air bubbles. Despite that, they still came out decent.

Not too bad...

Now if doing a shitty job applying these could give me okay results, then imagine what they would look like if I took my time and applied them carefully...

Awesome.
Jinx are extremely easy to apply. They're basically just stickers made of dry nail polish, and they were almost the perfect size for my nails. The most difficult part is smoothing them out so that no air bubbles get stuck between the sticker and the nail, and even that part is pretty simple. I wasn't sure if these worked with top coat, but I applied a coat of Seche Vite on top of them anyway and  it worked out just fine.  I'll definitely be buying these again. I hope to go back to Five Below next week once all of the trees and branches are cleared from the roads (and my car...).

I do have a giveaway coming up once I hit 100 followers, and I was thinking of buying a couple of packs of these for it. Would anyone be interested in getting these in a giveaway? What about Funky Fingers polish? They now have the FF crackles at my local Five Below, as well as the entire Island collection. Let me know!

Batman Lightning Bolts

Posted by Erin on 8/21/11. Filed under: , , , ,
6 Comments

Yesterdays birthday celebration went well. Cake, cheeseburgers, and cards full of money were in abundance. If I weren't so lazy and tired today, I would have gone out shopping. But instead I have been laying in bed recovering from the 1 too many glasses of Skinny Girl Margarita that I poured myself last night ;)

I haven't even mustered up enough energy to paint my nails yet. But I do have something from the vault to show you all. This is a mani that I did using one of Nailside's tutorials. If you haven't given her blog a look yet, you have to immediately. She does the most creative scotch tape manis you've ever seen. 


It looks a little Batmanish, right? That's completely accidental, but a welcome outcome nonetheless. This took forever to finish and by the time I was done with my right hand, I had no energy or patience to do my left hand :P

I have loads and loads of nail mail coming my way. I couldn't even begin to count just how many bottles I'm expecting this week. Let's just say that this blog is going to be in swatch overload for quite some time.

Dripping in Chocolate

Posted by Erin on 8/19/11. Filed under: , ,
5 Comments

I'll be 29 years old on the 23rd. That may or may not sound old to you, depending on your age. To me, it is a reminder of the fact that I'm still not married. I like to think of myself as the type of broad who doesn't really care about societal norms, but the fact is that I did always envision myself being married by now. The good news is that I can still pass for 21. At least that's something.

Anyway, I am celebrating my 29th tomorrow and wanted to do something kind of....sweet to celebrate my descent into old maid-hood. And given the fact that I have sworn off chocolate for the last 2 weeks in anticipation of birthday cake, I chose to drip my nails in chocolate. Okay it's not real chocolate. But it kind of looks like it!


I've seen a lot of these "drippy" manicures going around, and I was surprised at how easy the look is to achieve. I may even do a tutorial on it, as a few girls on tumblr have inquired about it. And speaking of tumblr, I'd love to be bff's with you on it if you have one of your own. Just let me know your url and I'll be sure to follow you. If you don't have one yet, you should consider signing up. It's proven to be an excellent tool for driving traffic to this here blog :)

Cherry Blossoms In Bloom

Posted by Erin on 8/18/11. Filed under: , , ,
1 Comment

Todays design was done using Kaylas cherry blossom tutorial. Hers looks much neater than mine, but shit tends to get a bit funky when you do a gradient background. They're not *that* bad, right? :)


Sadly, this was just a quick post to show off my current NOTD. I may have some swatches up later on, so stay tuned. 

Oceanic Gradient

Posted by Erin on 8/14/11. Filed under: , , ,
6 Comments

My mom used to collect these really cool blown glass pieces. Most of them are globes filled with awesome patterns and colors, and others are in the shapes of animals like fish or frogs. They're knickknacks, yes. But they're also really pretty and perfect as nail art props. 

This piece went perfectly with my NOTD, which is a subtle blue gradient made with OPI's What's With the Cattitude and Ogre-the-top Blue with Last Friday Night layered over it. I probably should have skipped the layer of Last Friday night, because it created a weird dimpled effect that kind of pissed me off.


I have a zillion little props to use, and I always forget to include them in my photos. I'm in the process of reorganizing (ok, more like organizing PERIOD....) my stash and will likely gather all of this up and store them right along side my polish. They may even serve as some inspiration :)

Styled On Hard as Nails Contest

Posted by Erin on 8/2/11. Filed under: , ,
3 Comments

I never enter contests because I never win anything, and with that sort of defeatist attitude it's really no wonder, right? :P But I decided to enter this one because I really do want the prize. It's a $150 gift card and a set of either Hard Candy or China Glaze polishes. 


Soooooo, I need your help! Please vote for me every day from now until the 7th! You can vote once a day. 

Here is the mani that I entered:

Special thanks to everyone who has helped me out with The International Polish List thus far. I still have some editing to do and some links to add. Please bear with me. It's a much more time consuming project than I anticipated! But I will get it completed and link all of you who have helped by the end of this week, and it will be added as a permalink. Thanks again!

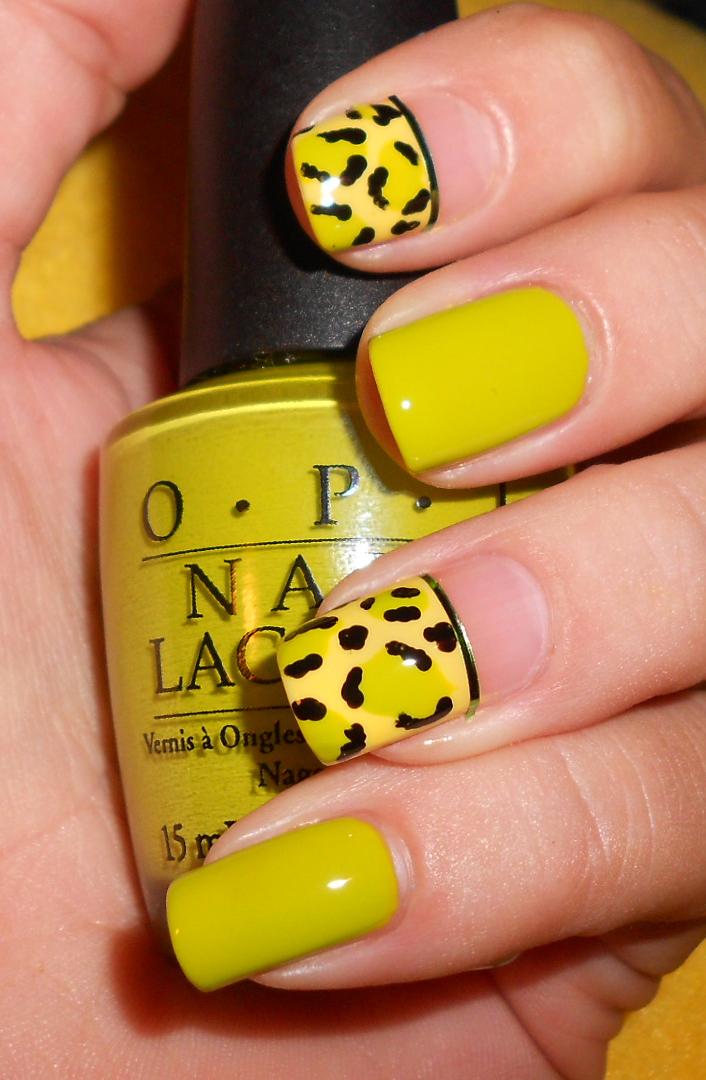
NOTD: Lemon Lime Leopard Print

Posted by Erin on 7/25/11. Filed under: , , , ,
No Comments »

All the chicks on facebook are doing fruit nails and they're awesome. I tried to do a pineapple mani, but my patience gave out and I decided to go for something more stylized. Here is what I came up with:


I love green nail polish and I just don't wear it enough. I also love yellow nail polish and I don't wear that enough either. So this was my excuse to combine both and use some of that striping tape that I love so much at the same time. For the green I used Who the Shrek are You? from OPI. The yellow I used is Lemon Icecream from Barry M.

NOTD: Tie Dyed and Hot as Hell

Posted by Erin on 7/22/11. Filed under: , ,
10 Comments

It's 100 degrees here today. Luckily I got my AC unit fixed last night, or else I'd be melting. And because it's so hot, I figured I'd try something summery on my nails for the day. Here are my tie dyed nails! (Excuse the messy cuticles. These are hard to do in a neat manner).


I used the following colors: Wild Child, Port Royal and Cheshire from Funky Fingers, and Fiercely Fiona from OPI.

EDIT: I wasn't able to find the exact tutorial that I saw on this a few weeks ago but I did find a really good one that should help you girls do this on your own. Here it is! If you try it out yourself, please shoot me a link to your blog so I can see!